If you have just started your journey in Android TV you will have noticed that, although it is “Android for televisions”, the menus are quite different compared to mobile Android. So much so that some basic settings are quite hidden, such as changing the resolution of the screen on which we are viewing the content. Changing this option can be useful both to free up a bit of network if your connection is not very good and to check in what resolution the contents are being loaded.
We are going to teach you how to change screen resolution from the Android TV settings, a very simple process, although not as intuitive as it should be. Let’s see how it is done so that you can check at what quality you are playing.
Change screen resolution on Android TV

Android TV has a complete settings menu that allows, among others, to change the resolution of the content. Although we can adjust the resolution to be adjusted automatically, we can choose it manually. For change the resolution you must follow these steps.

- Open the settings menu
- Click on ‘device preferences’
- Click on ‘more’
- Click on ‘monitor’
- Hit ‘screen resolution’
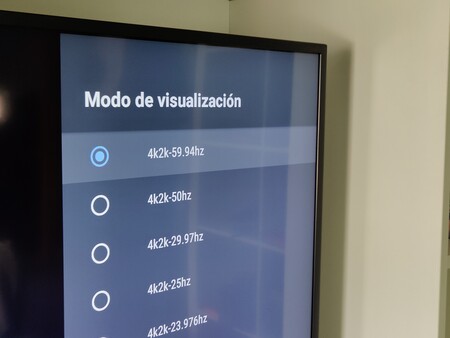
- Now click on ‘display mode’
From ‘display mode’ you can choose the resolution and hz at which you want the content to be reproduced. Also, from this menu, you can set that the resolution is automatically adjusted according to the contents, the color depth settings and even the video output settings.
If, for example, your network does not load content in 4K well, you can lower the resolution to 1080 so that, even if a series or movie is in 4K, it adjusts to the lower resolution and makes it easier to load the content. This change will be permanent until you reverse it. manually.


