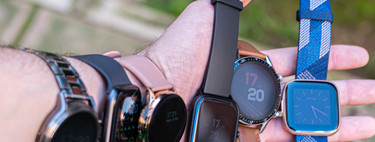
One of the advantages of having a smart watch is that you can change its appearance almost completely by changing the dial (also known as watchfaces). In the specific case of Amazfit smartwatches, from its application you can install dozens of spheres And that’s not to mention unofficial places with even more designs, like AmazfitWatchfaces.
Dials for Amazfit watches are not lacking, but if you have a specific idea you will need to roll up your sleeves. Creating dials for an Amazfit watch is not difficult, although it does require dedication and patience. Here we will see how you can create dials for your Amazfit smartwatch in three ways with different levels of difficulty and customization.
From the Amazfit app
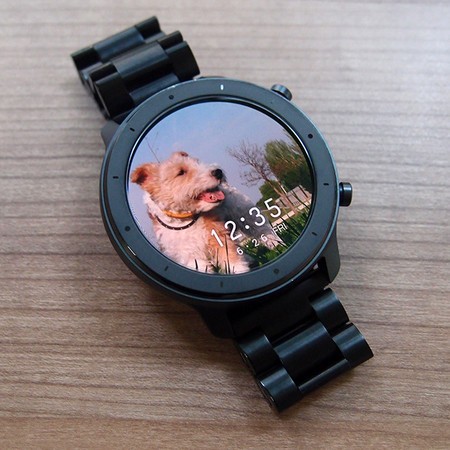
If you just you want to put a photo on your watchThe easiest way to do it is with the official Amazfit application. This is the easiest method of giving your smartwatch a unique touch, although it has the disadvantage that customization is limited to the background image and is not available in an analog version.
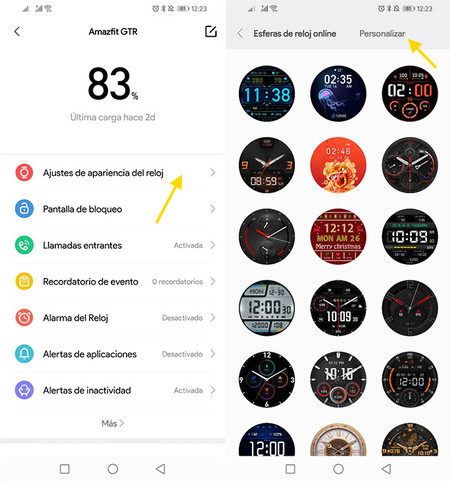
To create a personalized sphere, you must open the Amazfit application on your mobile. In the tab Profile, tap on your watch to open its options screen, where you must tap Watch appearance settings. Then touch Personalize.
Now comes the fun part. Tap on change the background sphere to choose a background photo, which you can take with the camera or from any gallery application you have installed, such as Google Photos. Before proceeding, you can adjust the cropping of the photo.
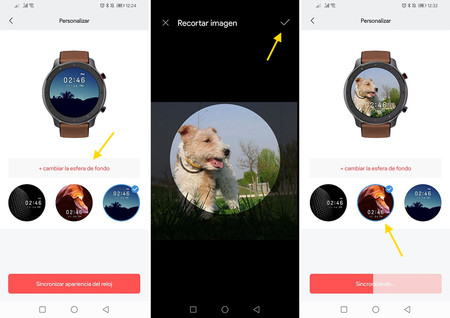
The application allows you to choose three locations for the time, which is superimposed on the image you have previously chosen. Choose the one you like the most and press the button Sync up, which will send your personalized dial to the smartwatch.
With ‘Amazfit Watchface Builder’

If you want to create a totally personalized sphere instead of changing the background image, you will have to resort to third party tools. Amazfit Watchface Builder is a web page to design watchfaces for Amazfit watches with support for dials in WFZ format.
This is the case of the Amazfit Pace, Amazfit Stratos and Amazfit Verge, although the Amazfit catalog increases frequently, so the list is not extensive. WFZ files are basically ZIP with images and XML files, so they are relatively easy to modify even without the help of any application. However, Amazfit Watchface Builder makes the process infinitely easier.
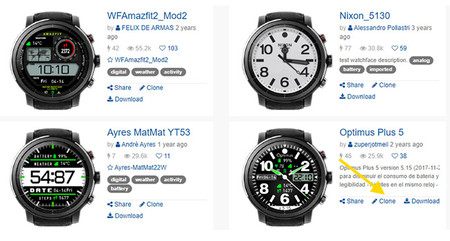
You will need to create an account, but otherwise you can start creating your sphere right away. The best is that you can clone any sphere from its list to make modifications, which will be much faster than creating one totally from scratch.
This tool allows you to create a sphere by changing the parameters from the web browser. For this, you have several boxes in which you can adjust the position and design of the main elements that make up your sphere. They are as follows:
-
Watchface Info. the name of the sphere and its description.
-
Digital. Here you can choose the font, size and position to be used on the digital watch.
-
Background. The background image of the sphere.
-
Analog. The design of the clock hands for the hours, minutes and seconds, as well as the (optional) design of the crown. In the list you can choose between several ready-to-use designs.
-
Widgets. It is a collection of elements ready to be included -or not- in the design of the dial, such as time, date, distance traveled or battery. You can also choose its position, but not its design.
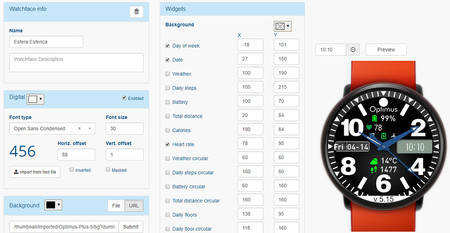
Creating a custom sphere with Amazfit Watchface Builder takes some time, although with enough patience you can create something quite personalized without too much effort. When you’re done, press Download to download your sphere in formwato WFZ, which you can install on the smartwatch with the help of specialized tools, such as Amaztools.
With GTR Watch Face Editor
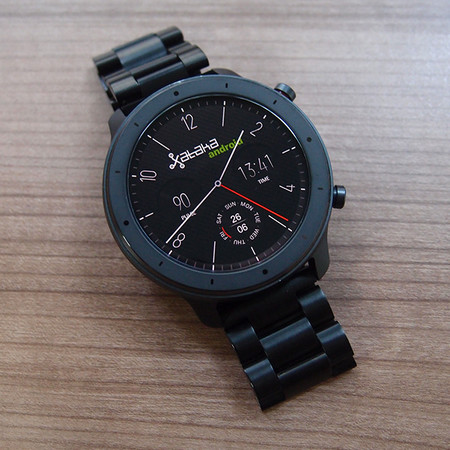
Although you can technically create a completely custom sphere with an image editor and notepad, use applications like the GTR watch face editor by SashaCX75Available for Windows makes your task much easier. You can download this tool here.
With this application you can create spheres for Amazfit GTR 42 or 47 mm, Amazfit GTS, Amazfit T-Rex and Amazfit Verge Lite. It is similar to the web application that we saw before, although it makes your task less easy (it does not help you with typography nor does it include any ready-to-use designs). You have more control over the outcome, though you must create everything from scratch. Luckily, you can also open a sphere you already have and edit it by pressing Unpack bin. Thus, you can open spheres downloaded from AmazfitWatchFaces.
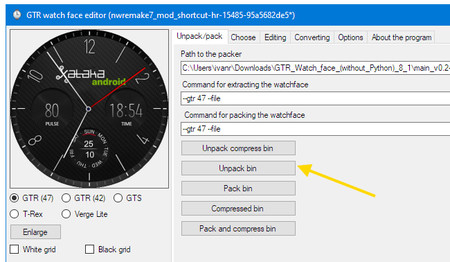
This will unzip the watchface into a folder on your hard drive, including the images used in it and the JSON file that includes directions on what is what and where they are located. Now comes the tricky part: modify the files to get the sphere of your dreams. The images are standard PNG files, so you can use them with any graphic editor you have installed.
In the application, all modifications must be made in the tab Editing, where there are different groups to configure the appearance of the elements of the sphere. For example, in the sphere that I downloaded, I have put the logo where the weather information was shown before, so in the tab Weather can i disable Activate so that the time is not displayed.
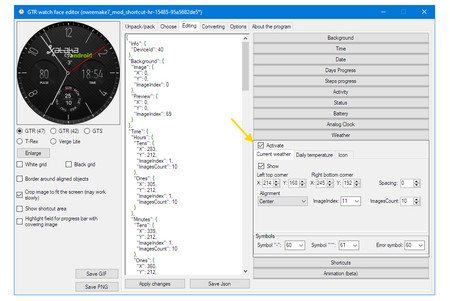
Each tab has its own options, but generally you will have to choose the position of each element and what image is used for it. The images are numbered, so if the minute hand on your watchface uses image 26, you will have to edit the file 0026.png to modify it.
I will not lie to you, creating spheres with this application is not excessively easy, although it is easier than it seems at first. After you struggle with the options for a couple of days, you’re bound to start getting the hang of it. These are the following sections that you can configure:
-
Background. the background image of the sphere.
-
Time. Set the look of the digital clock. It can be disabled.
-
Give yourself. It allows you to add the date on the dial, with different options to show the day of the week, year and the like.
-
Days progress. Shows the current day, but in graphical form.
-
Steps progress. A graph to show the steps.
-
Activity. Here you can add an indicator with steps, distance, pulse, calories and goals.
-
Status. Set the status icons (Bluetooth connection, Alarms, Lock, Do not disturb)
-
Battery. It allows you to include the clock battery as number, icons and graphics.
-
Analog clock. Here you set the appearance of the clock hands.
-
Weather. Here you can configure if the current time and temperature icon is displayed.
-
Shortcuts. You can include up to four shortcuts to directly open the step view, pulse, time or energy saving mode when touching in a specific area.
-
Animation (beta). Experimental function to add animations in your sphere.
The good thing about this application is that it shows you a real-time preview how your sphere looks with each change you make, so you can play around with the parameters to see what changes. In the background, in most cases you will simply be changing X or Y coordinates on where a specific image is located.
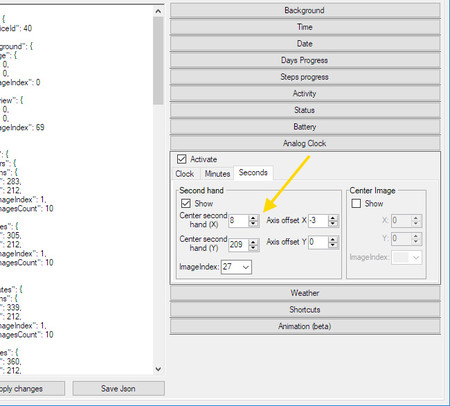
With a lot of patience, creativity and an image editor, you can create a sphere completely in your image and likeness. Creating spheres is easy, although they look good is not so much. When you are satisfied with your creation, press Pack and compress bin to create a file that you can install on your Amazfit.
The application does not install the sphere, but you must use an application to transfer your face to the watch. On Android, a good alternative is Tools & Amazfit. To install a custom watchface with this application, you must go to the options tab and touch Install Custom, then choosing the file you created with GTR Watch Face Editor.
