One of the drawbacks, few that yes, that we can put the Chromecast with Google TV is the low storage capacity. We have only 8 ridiculous gigs of capacity in which to install applications, add-ons and in which to store multimedia content.
An obviously scarce amount that comes to be a handicap that we can overcome with a little inventiveness and without spending a single euro. We just have to look in the junk drawer that we have at home. That place where we keep pendrives, memory cards, connectors … It is the solution to have almost unlimited gigabytes and gigabytes on the Chromecast.
From 8GB to infinity … or almost
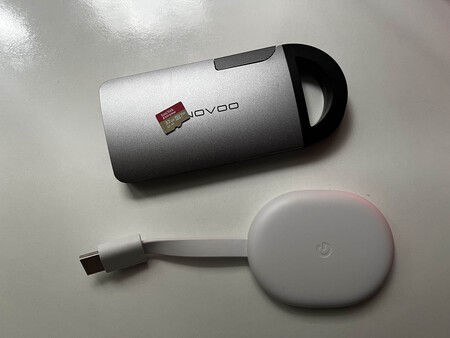
This is what I used to expand storage
The objective is expand the storage capacity we have on the Chromecast with Google TV. As a kitchen recipe we will need a Chromecast with Google TV (obviously), a memory card or pendrive and a HUB with power input, USB output (it does not matter if it is USB type A, B or C) and input for memory cards or USB in which to connect the pendrive.

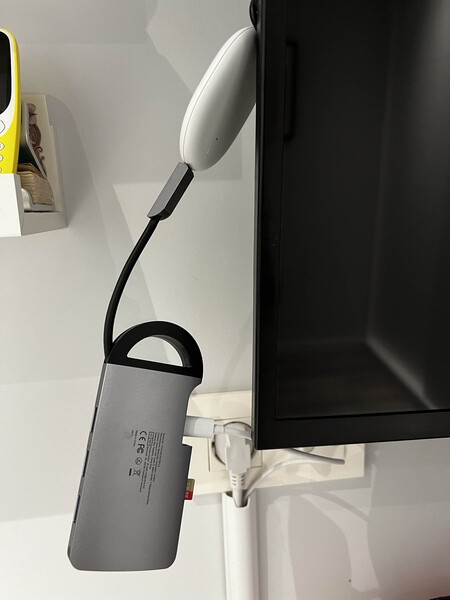
With all these ingredients we connect the power of the Chromecast to the HUB that we have just searched and in which we have previously connected the pendrive or memory card. From the HUB we take a cable to the Chromecast that will be the one that transmits current and data. We check that the Chromecast turns on correctly and we continue.
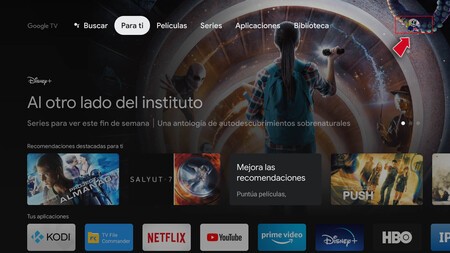
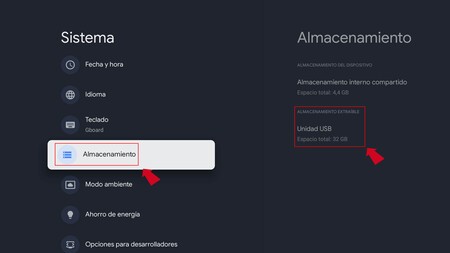
Once inside the main screen we look for the icon of our profile, at the top right and click on it. It is about accessing the options of the “System” among which we must search “Storage”.
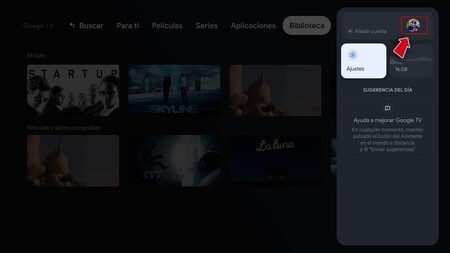
We will see several options but we look at “Settings”, which appears in the left area of the new panel.
In the right area there is a panel in which we will see next to the internal storage the one offered by the unit that we have just added, in this case 32 GB via memory card.
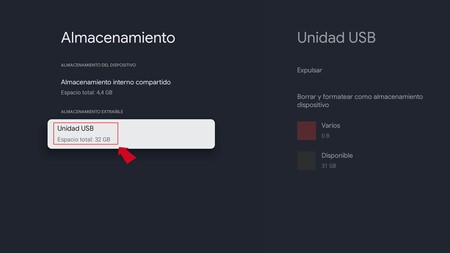
If we click on this section, we will see how two options appear: “Expel” and “Erase and format as device storage”. It is on this option that we are going to click.
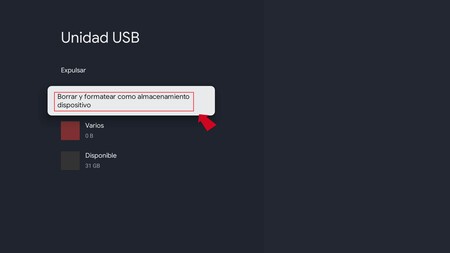
We will have to take into account that all the data that we have stored in the unit will be erased. The objective of this system is create a whole, a memory that expands the 8 GB we already have. From here, we can move data from the internal memory to the new memory that we have installed if we click on “Migrate data to this storage”.
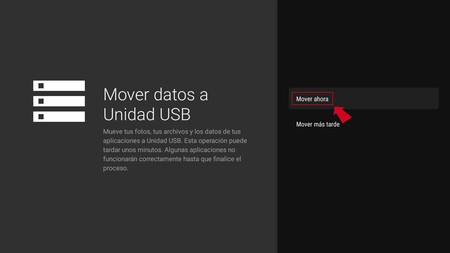
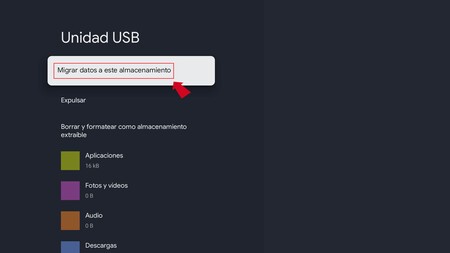
These are the steps we must take if we want to use both memories as if they were one. If, on the other hand, we only want to use a memory in which to add multimedia content to read from the Chromecast, we can avoid the last steps, since it will not be necessary to format the unit.
All you have to do is enter an app like File Explorer and we will see the unit that we have just installed and from there we will be able to read the data that interests us.


