Create good android apps it’s a complicated process, but just create an android application it’s available to anyone with a little patience and $ 25 on a credit card.
Here we tell you the process you must carry out to create an app and publish it on Google Play. It is not an exhaustive guide that would occupy several books, but rather a starting point and list of steps that you must carry out if you want to create and publish your first app.
Android Studio first
Today there are several ways to create Android applications, such as the project Flutter, although the official development environment is still Android Studio. Formerly instalar Android Studio It was a complicated process in which there were several moving parts, but the truth is that today it is a matter of five easy steps.
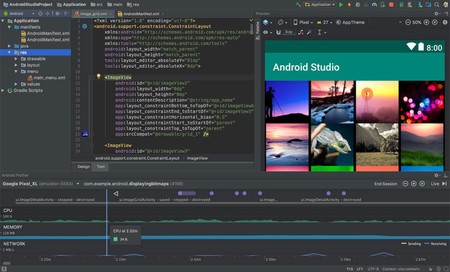
Android Studio is compatible with Windows, Mac and Linux. The download is quite heavy, occupying around 800 MB these days. Not only do you need a PC with plenty of available hard drive space, but all the power it has – especially hard drive speed and RAM – will be welcome.
Your first app
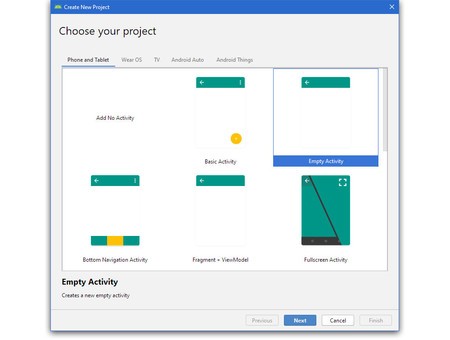
After installing Android Studio, it’s time to create your first project. The application has its own wizard that allows you to choose between some templates so that you don’t start with the blank page. Our intention is simply to create an app, so with Empty Activity we have enough.
This template creates the minimum files required for the application, including Java (or Kotlin) code, layouts, and text strings. The app only includes a text in the middle of the screen that says “Hello World”, all a programming classic.
In the next section you must enter some details about the application, such as its name, the name of the package (which must be unique), where you are going to save the project and the minimum Android version required. Android Studio itself shows you the potential percentage of Android devices that you will access each version, although Google it has not been updated for months.
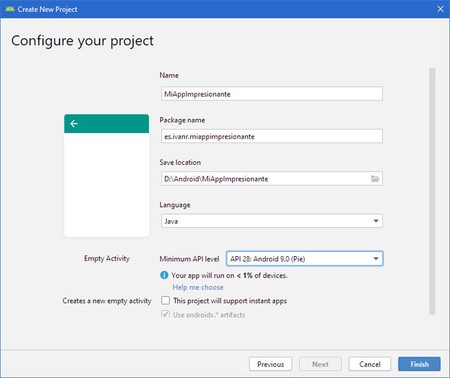
Android Studio is a monstrous application and we would need several books to explain each option. However, with the two previous steps you will basically already have an extremely simple application: your first Hello World en Android.
Time to generate the APK (or the App Bundle)
Our ultimate goal is to upload the application to Google Play, and for this you will need to create a file with your application. Normally this is an APK, although recently Google is promoting other types of formats, the Android App Bundle, with extension AAB. For this use the menu Build > Generate Signed Bundle or APK.
Regardless of which format you choose, you will need to generate a signed file to be able to upload it to Google Play. This signature is used so that only you can create updates for the application. You need to use a certificate, but if this is the first time you create Android applications then you must first create said certificate. It sounds complicated, but it is basically pressing Create new.
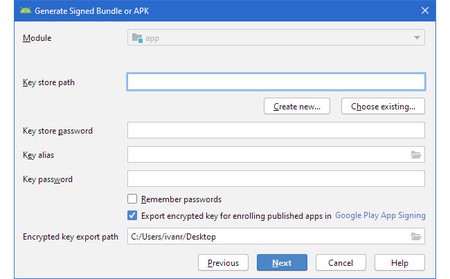
It is then time to choose the location of the file with the certificate, as well as a password for said certificate. Each certificate can contain different keys, so you must also create a key with whatever name you want (the default name is key0) and a password.
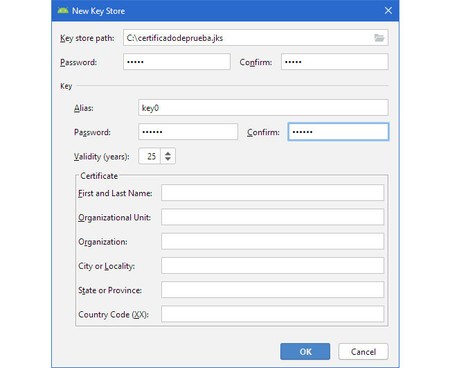
It is necessary that you fill in at least your name in the certificate and otherwise you will have it ready for generate a signed APK or App Bundle, necessary to upload the application to Google Play. From here, the process continues in the Google Play Developer Console.
Register your developer account
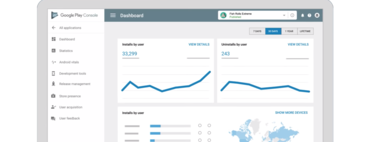
To publish applications on Google Play you need to register in the Google Play Developer Console. The bad news is that it is necessary pay 25 dollars in advance with a credit card. The good news is that it is a one-time payment for life. To register as a developer, you just need to go to registration page and sign in with the Google account you want to link.
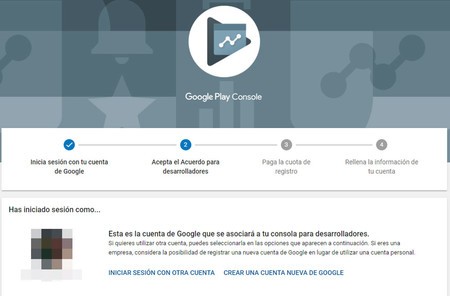
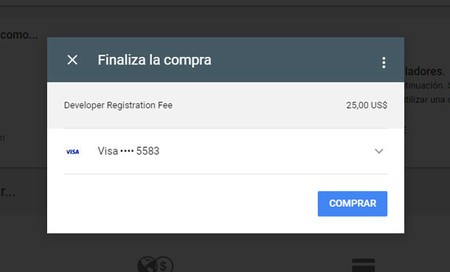
The process consists of four steps: log in, accept the agreement, pay and fill in the information. You need to use a credit card associated with your account, in which 25 dollars will be charged. As we mentioned before, it is a one-time payment for life.
Finally you must fill in your developer profile, with basic details such as your name, address and email. You can later edit these details from the Google Play Developer Console itself.
Your app’s profile on Google Play
You have already signed up for the Google Play Developer Console. Now you need to register your application by clicking on Create new app. Despite what the button may suggest, it is used to create the profile of a new app on Google Play and not to create the app itself, which is the job of Android Studio.
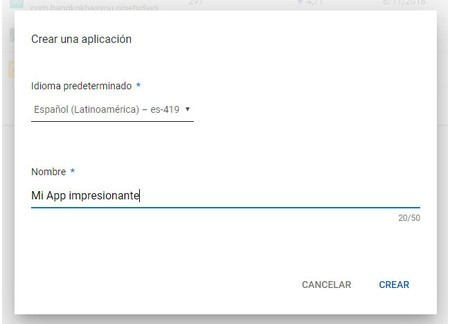
The first step is simple: choose a default language for the rest of the details that you are going to enter: texts and images and write the name of your application. This name does not have to match the name that it officially has in the APK, and you can translate it into different languages.
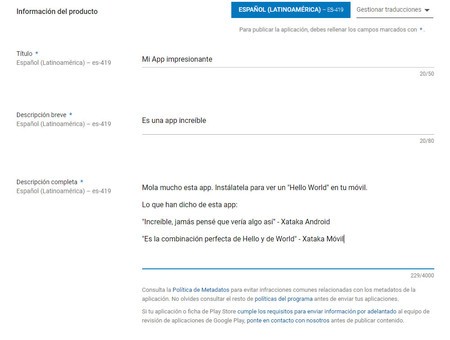
In the next section you can provide more complete information about the application, including a short title and a Complete description. All this information will be shown to users on Google Play.
You must also upload the application icon and screenshots showing its use. A minimum of two screenshots and up to eight in total per category. The different categories available today are screenshots on a phone, tablet, Android TV, and Wear OS.
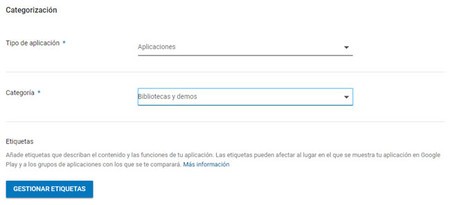
The information of an application on Google Play also includes other data such as the category of the application and a recent novelty is the possibility of including labels. They are not visible to users, but are used to improve searches.
Time to upload the file
The order of the factors does not alter the product, and before your application is published on Google Play you need to fill in a few sections. One of them is obviously upload the app itself. For this you first need to create a new version.
In section Application versions you can create a new production version (stable), beta, alpha, internal test or pre-registration. If you are proud of your application and want to publish it as a stable version application, then click Manage in the production section.
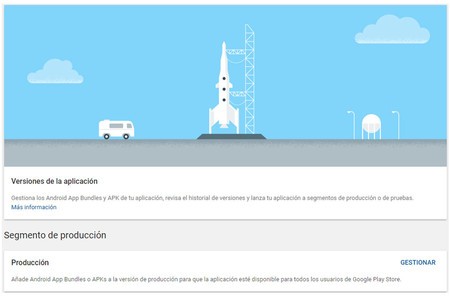
Shall then upload the APK file or the Android App Bundle, with AAB format. Android Studio generates these files normally in the subfolder app/release of the project. Upload the file to the Google Play Developer Console

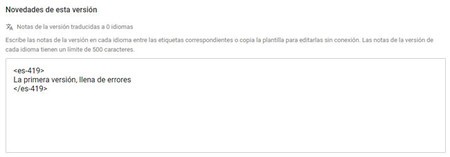
The Google Play Developer Console extracts some details from the APK like the version, but other details like the change list run on your account. You must fill it out in the form, being able to include as many translations into other languages as you want.
Last details
With the previous steps you have already covered the vast majority of the process, but the Developer Console does not let you continue unless you satisfactorily complete five sections: app versions, Play Store listing, content rating, app content, and price and distribution.
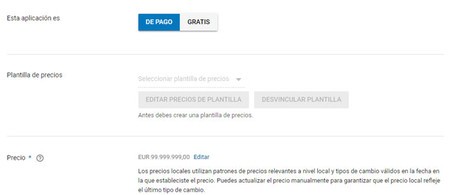
The latter, the price and distribution is especially important. You need to choose between if the application is paid or free, and you won’t be able to change your mind later. If you chose a payment application, you can choose the price in the accepted range, which for Spain is from 0.50 euros to 350 euros.
You must also pass content classification, which will allow you to calculate the minimum age of your application. The process is as simple as completing a form where you are asked for details such as whether the application contains violent content or potentially offensive language.
Similar, but different, another mandatory section has recently been included: Content and target audience. It is another form, although this time it is not about calculating the minimum age, but the target age for your application. An app that children can use is not the same as one designed specifically for children.
The review process generally takes one to three days
When you have completed all the required sections, you can finally submit the application to Google for review. If all goes well, it should be visible for the next 24 hours, although Google is doing a more exhaustive review lately.
He process to publish applications on Google Play is quite long, although at least you only need to do it once. In the subsequent updates of your application you only need to upload the file with the new version and write the list of changes. If you want.
