The driving mode of the Google Assistant is finally being activated for users. You will recognize it as it is a bar that appears below Google Maps during a route. If you are not convinced, you can easily disable it.
Driving mode is something of a miniature Android Auto, giving you quick access to music playback and the Assistant. However, on somewhat slow mobiles the experience is not very pleasant, with constant resizing of the windows. We tell you how to deactivate the Assistant’s driving mode, in the two possible ways.
Deactivate driving mode from itself
There are two ways to end Google Assistant driving mode. If you have started a route in Google Maps and the same bar appears at the bottom, you can deactivate from the driving mode itself.

To do this, tap on the squares icon (bottom right) and choose Settings in the list of applications displayed. For now there are only two settings and one button: Disable driving mode.
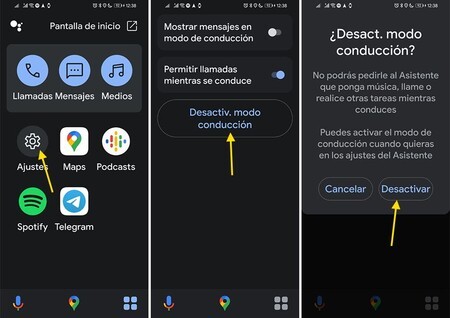
You shall confirm In the window that appears you want to deactivate driving mode. Remember that you can easily reactivate it from the settings, if you need it later. This is the summary of the steps to deactivate the Assistant’s driving mode:
Deactivate driving mode from settings
There is another way to deactivate the Google Assistant driving mode that does not require you to start a journey first: from Google Maps settings. It is the same place you will have to go in case you deactivate it and later want to activate it again.
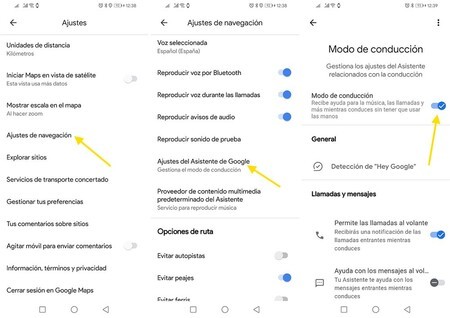
To do this, go to the Google Maps settings and tap on Navigation settings. Go into Google Assistant Settings and you will see that the switch appears at the top for Driving mode. Disable it and it will not start automatically on the next ride. This is the summary of the steps:
-
Tap on your profile picture on Google Maps
-
Tap on Settings
-
Go into Google Assistant Settings
-
Deactivate Driving mode