If you are thinking about getting started in creating your own Android applications, the first necessary step is install Android Studio. It is not the only IDE with which you can create Android apps, but it is the official and best adapted for the operating system.
In the beginning Android Studio was not very different from IntelliJ, on which it is based, and required juggling installing Java JDK and Android IDE separately, recently the process has changed and it is much easier: Basically it’s just clubbing the Next key.
1. Download Android Studio
The first step is obviously to download the installer. It is officially available for Windows, Mac and Linux, and you will find the download link on its official website. We are going to focus on the Windows version, although many indications will serve you for the other operating systems.
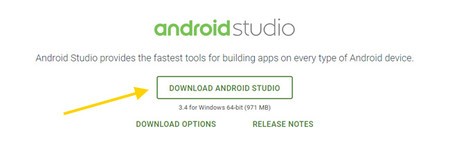
Make sure you are connected to the Wi-Fi network, because download takes about 1 GB. Depending on the speed of your Internet connection, it will take more or less, so be patient. As soon as it’s done, click on the downloaded file to start the installation.

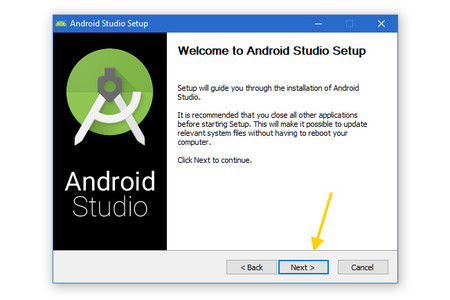
2. Start the installation
Android Studio is an enormously complex tool, but luckily its installation is not. Although it is only available in English, the truth is that there is not much difficulty because on most screens you only need click Next, or next.
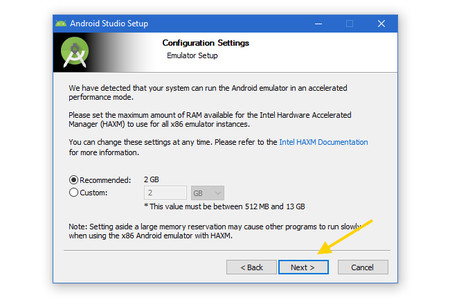
The only place where you can have any more doubts is in the configuration on the maximum RAM to be dedicated to the emulator Android. The truth is that you can change this later and the recommended configuration is … well, that is recommended, so in this window the most sensible thing is to press again Next.
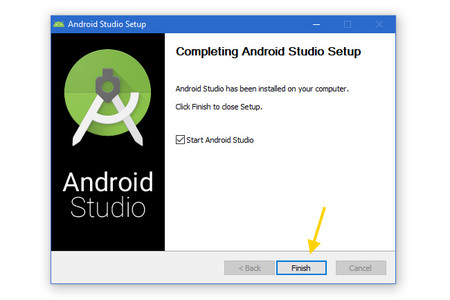
Otherwise there is no major difficulty in installation and the actual process will begin soon. It can take a long time if your PC is running at the right power, so be patient. Once I finish, press Finish for Android Studio to open for the first time.
3. Initial setup
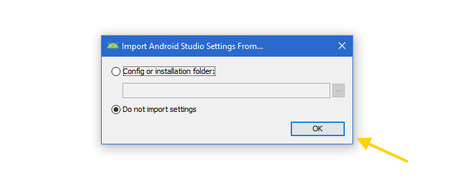
The first thing you will see when opening Android Studio for the first time is a screen like the following. In it you are simply asked if you want import settings from a previous version. Android Studio will generally detect the settings by itself, and if you don’t have any previous settings saved it will be checked Do not import settings, or not import configuration.
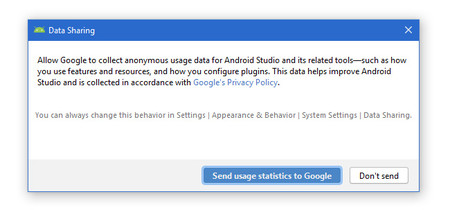
The next window that will appear asks you for permission to send usage data and statistics to Google, in order that they be used to improve the application. It is totally optional, so accept it with Send usage statistics to Google or not, in this case by clicking on Don’t send.
After this pre-configuration wizard comes the Setup Wizard. In truth they are only a couple of windows with the most important configuration options and that, in any case, you can always change later from the settings.
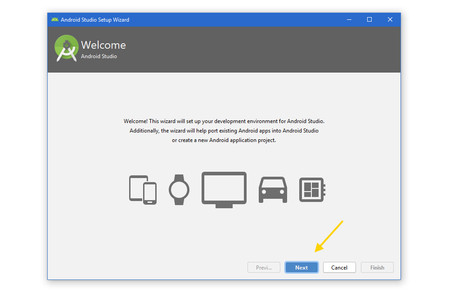
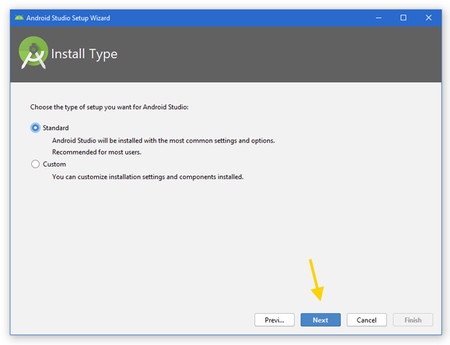
The first thing you are asked is if you want to make a standard or custom installation from Android Studio. In the vast majority of cases, the standard installation is sufficient and will save you time and the occasional headache.
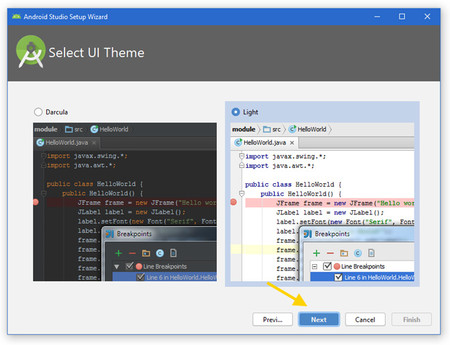
Then you have to choose what theme are you going to use in the code editor. The factory brings two: the light theme Light and the dark theme Darcula. Choose the one that most convinces you, although you can always change it later from the options, as well as customize all the colors and fonts if you wish.
4. Download the components
Remember when we commented at the beginning that installing Android Studio was a mess in the past? Part of the blame lay with Java and the Android SDK, but now the process is automatic. If you chose the standard installation, Android Studio chooses for you the components you need to download.
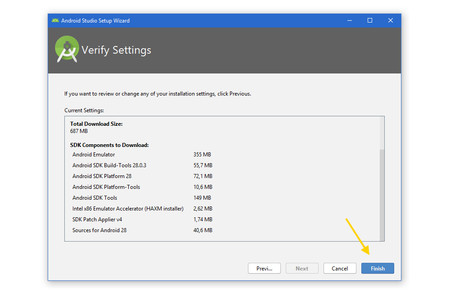
Once again the download surely exceed 500 MB, so make sure you are connected to a Wi-Fi network and have enough disk space. Let the PC do the work for you and wait for the download and installation to finish. When done, press Finish.
5. Enjoy Android Studio
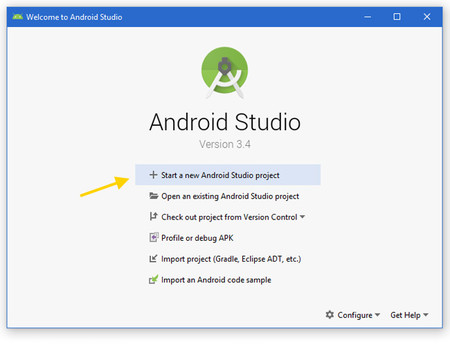
It is done, Android Studio is already installed on your system and it will show you the welcome screen. Surely you are wanting to create your first Hello, world, on Android, so for this you need to click on Start a new Android Studio project.