We have told you how test the latest versions of Android on an emulator, how to test Wear OS and how to test android auto, so it was clear what the next step was: how to test Android TV in an emulator on Windows.
If you are thinking of buying a TV or a device with Android TV as a Xiaomi Mi TV Stick, you may want to try it first to see if it is what you are looking for. For this you can use Android Studio and the official Google emulator, which works reasonably well and the process is not complicated at all.
1. Install Android Studio
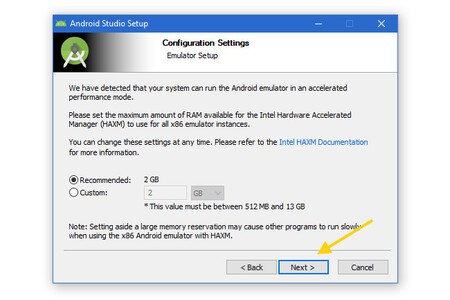
The first thing you’ll need is Android Studio, the official Android programming IDE. We have told you on several occasions how to download and install Android Studio, although the process can be summarized in two steps: download the Android Studio installer from its official website and complete the installation, which is little more than hitting the Following.

The good news is that, unlike the Wear OS or Android Auto emulator, to test Android TV you don’t need ADB nor do weird things. It’s all quite simple and you should have it ready in a few minutes.
2. Create your virtual TV
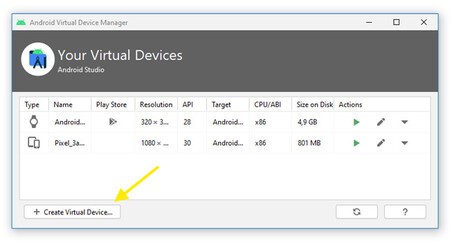
With Android Studio installed, you should go to AVD Manager, the place where the virtual devices for the emulator are created. You will find it in the menu Tools – AVD Manager. After opening it, press Create Virtual Device, or create virtual device.
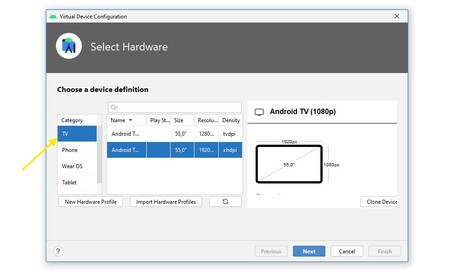
In the window that opens, switch to TV category and choose one of the two profiles that are available. Both simulate 55-inch televisions, with the only difference being that one of them has 720p resolution and the other is Full HD. The choice is really irrelevant, although if you are a fair bit of performance, you may be interested in choosing the 720p one.
Then you have to choose what software that device will have. From Android Studio you can download Android TV system image based on Android 10, 9, 8 and earlier versions. The choice is yours, just make sure that you are downloading the version that corresponds to the architecture of your PC, and that in most cases it will be x86.
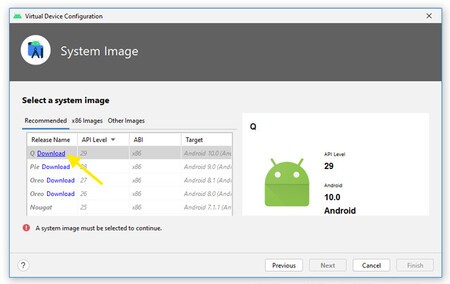
As soon as you click Next, the firmware will begin downloading. It occupies about 600 MB, so it will take a while to download and another time to decompress and be ready to use.

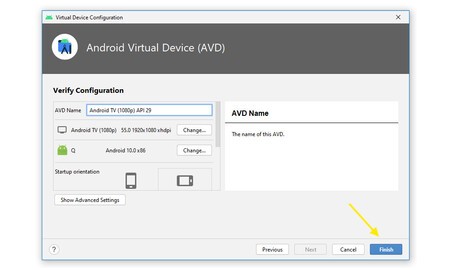
In the last step you have a summary of everything you have done up to then and you can optionally give your virtual device a name. Changing the orientation does not make much sense on a TV, although it is also possible. Credit Finish to complete your virtual TV.
3. Try your new virtual TV with Android TV
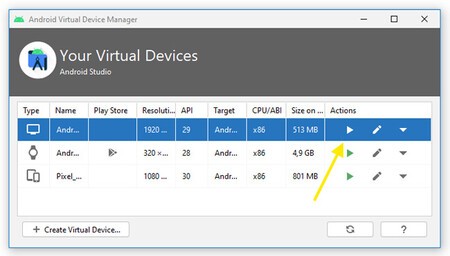
Your TV with Android TV is ready, but you haven’t started it yet. To do this, go back to the AVD Manager window and hit the play button next to the virtual device of your TV. If you didn’t change the name, it will be called something like Android TV (1080p) API 29.
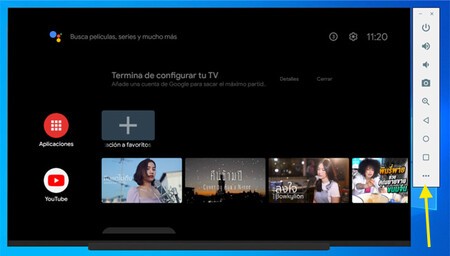
Voilá, your virtual TV with Android TV will be shown in front of you, showing the same interface and the same initial setup assistant as if you were watching it on a TV. Unlike the Android emulators for mobile, the Android TV emulator comes with all the Google services and Play Store installed, so that you can download new apps directly from the emulator.
Android TV is generally used with a remote control and, although it is possible to operate it with a mouse and keyboard, if you want a kind of virtual remote control. To do this, press the button with the three dots in the floating menu.
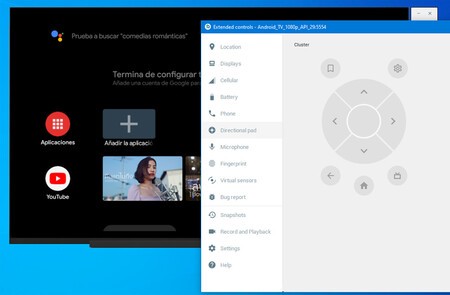
In the tab Directional pad You will find controls similar to those of a standard remote control on Android TV, with directional buttons, a button to go back to home and another to go back. The downside is that it takes up a good part of the screen, and cannot be resized.
With the Android TV emulator you can get a good idea of how the system works, what applications are available and what they look like. Performance is pretty good, so that it is even possible to watch videos on YouTube or similar applications.