This 2019 Samsung has decided to bet on high resolutions in its cameras, as well as increasing the number of sensors. Versatility above all by flag, and a fairly complete camera interface that comes from the hand of One UI and Android 9.0.
We are going to collect some of the best tricks for squeeze the most out of your Samsung Galaxy camera, regardless of whether your model is high-end or mid-range (the only requirement is that it runs under One UI). The Samsung camera hides many secrets, and we will try to ensure that there are practically none left to reveal.
Turn the image optimizer on and off
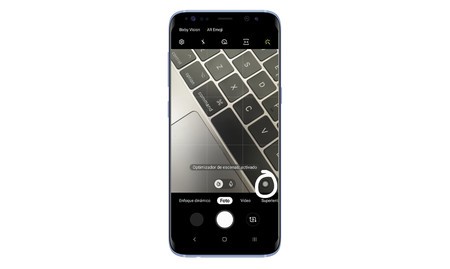
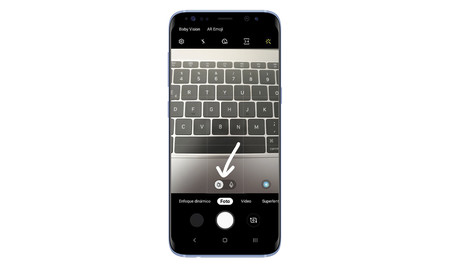
Most phones that have artificial intelligence to recognize scenes and ‘improve’ the results of the final photograph, usually have it activated by default, or show a small shortcut of ‘AI’. In the case of Samsung, they wanted to be more discreet, and the scene optimizer is located on the main camera screen on the right.
The image optimizer uses artificial intelligence to try to improve the results of the final shot
As its name suggests, the scene optimizer analyzes the shot we are going to take, to make adjustments to the level of color, contrast, sharpness … Your result it depends directly on the phone we are using, and it will depend on the user’s taste if it is worth activating it or not. When in doubt, it is good to know its location, and test whether the results convince you or not.
Learn what the ‘trees’ on the interface mean
Depending on our device, the camera interface will show us, just above the ‘photo’ section, different trees. Each of them indicates the angle that our phone will reach when taking the picture, so it is very useful to know what each one is for.
- A tree: 2X zoom mode (if our phone has a sensor for it)
- Two Trees: Wide Mode (Normal Photography)
- Three trees: wide angle mode (if our phone has a sensor for it)
Remember that not all cameras on your Samsung Galaxy have the same quality, so you should familiarize yourself with each one of them to know which is the most appropriate in different situations.

Become a master of ‘dynamic focus’ mode
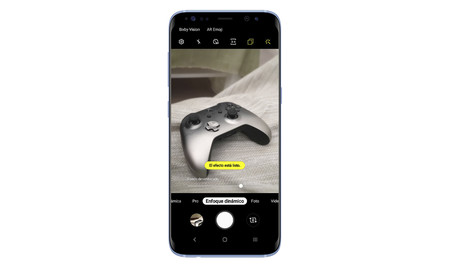
The portrait mode of the Samsung Galaxy is called dynamic focus, and allows us to take pictures with the background out of focus. First of all, we select it by swiping on the main camera screen (it’s right next to photo mode). Once selected, we must respect the distance that the camera proposes, if we get too close or too far from the object, it will not activate. While we are taking the photo, if the mode has been activated, we can change the level of blur.
The bokeh level can be adjusted before and after the photo is taken, but the bokeh effects are modified in the gallery after the photo is taken
Afterwards, we can modify the bokeh of the photograph at the shape level, as well as the selected area. For this we have only open the gallery and edit the photo. If it has been done with a dynamic approach, we will have these options available.
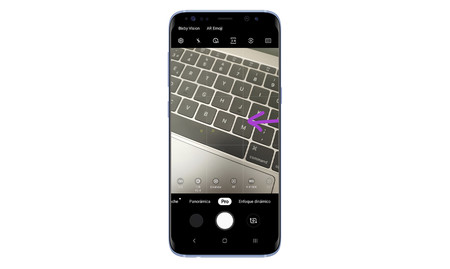
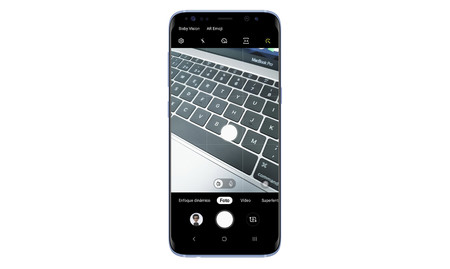
Learn to operate the professional mode
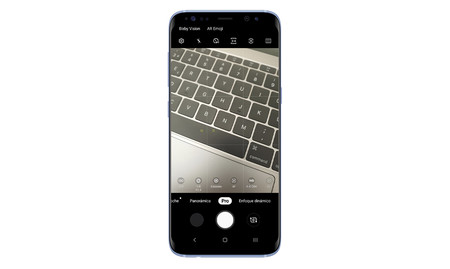
Right next to the dynamic approach, we find the Pro mode. This comes to be samsung manual mode, in which we can adjust various parameters to improve our photographs. In mid-range alternatives, such as the Samsung Galaxy A70 or the Galaxy A50, we can adjust the ISO, white balance and exposure level.
However, in high-end proposals Like the Samsung Galaxy S9 and S9 +, we can modify ISO, aperture, color temperature, tint, contrast, shadows, autofocus, activate focus areas … If you want to know how to use these parameters correctly, we leave you with a photographic guide where we explain the basic terminology.
Learn how to activate filters live

The Samsung camera allows us to use filters in real time for our photographs. To activate them, we just have to click on the icon in the upper right corner (it is shaped like a ‘magic wand’).
Once activated, we can see in real time how the filter looks, and after taking the photo, it will be applied to it. In the same way, in this filter mode, there is the beauty mode, which will be in charge of softening our skin, eliminating imperfections, changing the tone, making the face more or less narrow …
Learn how to use Bixby Vision

Bixby Vision is a fairly powerful Samsung camera feature, which has with its own shortcut at the top of the camera interface. After activating it, we access a good list of options.
- Translate text in real time
- Focus on an object to find similar products
- Focus on an object to find where we can buy it on the internet
- Focus on an area to know where we are
- Take a photo of the food to have information about it
- Take a photo of a wine label to get vintage information
- Scan a QR code
- Possibility of adding AliExpress, Picture Link or Amazon Assistant actions
Create your own AR Emoji
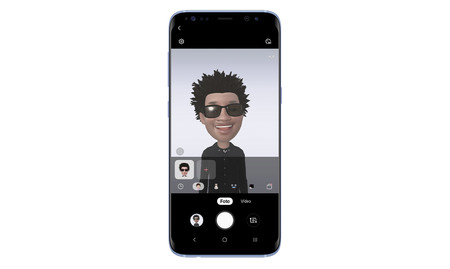
Samsung also has its own Animojis AR Emojis, a function that allows you to create a virtual avatar through the camera. Later, we can use these AR Emojis to send stickers to our friends, or take pictures using them in real time. The result is not as good as that of Apple’s Animojis, but it is a good proposal to have fun with the camera of our Galaxy.
Turn on the camera with a double tap
Galaxy devices have one of the most useful Android features: turn on the camera with a double tap. Just press twice on the power button for the camera to run, even if we are on the lock screen. It is a quick solution to open the camera in any situation to take a photo.
Activate the grid to frame better
If we want to frame a photograph correctly, the best method is to use the grid. This will divide the photograph in equal parts, which will allow us to get an idea about the proportions that we are framing. To activate the grid we must go to camera settings.
Once in them we select ‘grid’. Regardless of whether our phone is high or low range, we will only see three options: deactivated, 3×3 or square. In our case, we recommend the classic 3×3 grid to start taking your photos with a better framing.
Take the shutter wherever you want
The shutter, regardless of the mobile we use, has always been found in the same part, we open the chamber, and down we run into him. However, Samsung terminals allow us to move it wherever we want.
To do this, we just have to hold down the shutter and drag it to any other part of the screen. This function is very useful, especially in large terminals in which sometimes we do not reach the shutter well. If we want it to return to its site, we drag it back to where it was. Of course, in the new Samsung terminals this function does not work.
Save photos as you see them in the preview
Our mobile phones give us a “wrong” preview when taking a selfie, so, afterwards, they rotate the image so that it conforms to reality. However, many of us like how the images are in the preview more, so Samsung has seen fit let us see these reversed images.
Within the camera settings, we will see the ‘save options’ option, in which we can activate the ‘images as preview’ option. This function It only appears in this menu on the Galaxy A, while in the Samsung Galaxy S it is in the ‘useful functions’ of the camera settings.

Add tags to know where you shot each photo
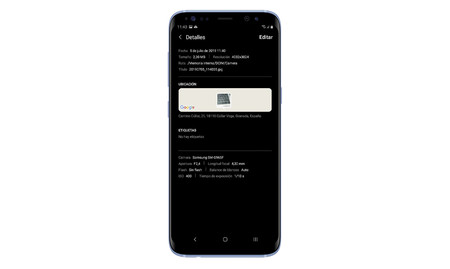
If you want to shoot a photo and have the phone save information about where you have taken it, you just have to go to the settings and activate the ‘location tags’. Once we have activated this option, is the details of the photo we will see the location of the photograph, and if we click on it, Google Maps will open to show us exactly where it has been taken.
Record videos in wide angle
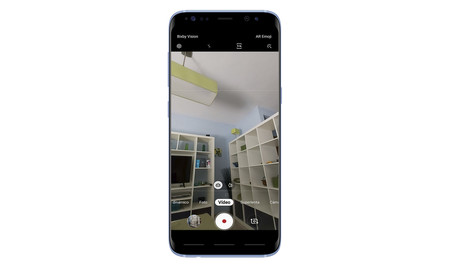
Samsung allows us to record video with the wide angle camera, making it not restricted only to the photographic section. Carrying out this process could not be easier, since we only have to go to the video section and click on the three trees to start recording with this camera.
Needless to say if we do not have a wide angle sensor we will not be able to have this option, which today we find in triple camera alternatives such as the Samsung Galaxy A70.
Learn to use super slow motion mode
Apart from the traditional slow motion mode, some Samsung Galaxy support super slow motion mode. This does not let us record videos in a classic way, but is restricted to immortalize certain movements, which it will play back at 960 FPS later.
This mode is recommended for actions like jumps, if we can capture the flight of a bird, or any creative idea that you can record in a few seconds.
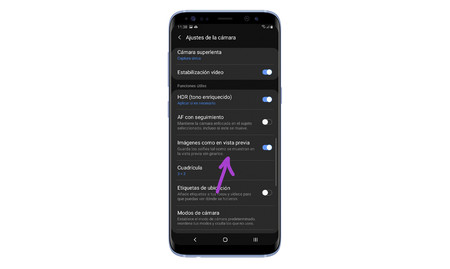
Activate subject tracking
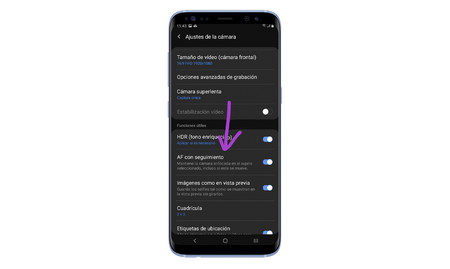
If we have a high-end Samsung device, such as the Galaxy S9 or S10, we can activate autofocus with tracking. This option is within the camera settings as ‘Tracking AF’, and it does what its name suggests.
The AF tracking mode draws directly from professional photography, and allows us to focus on an object even if it is in constant motion
After activating it, the camera will be able to follow the subject that we have focused on without losing focus, even if it moves. It is a practically essential option to shoot moving objects making sure that the photograph does not come out blurry.
Set shooting methods
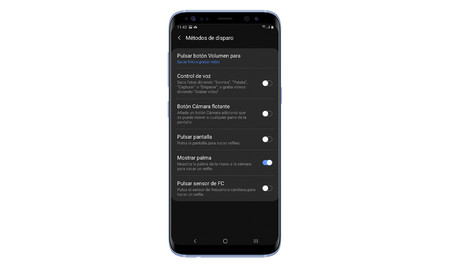
Within the camera settings we find the ‘shooting methods’, one of the best options for configure how we want to take photos on our phone. The number of options varies depending on the device we have. Specifically, in the high-end Samsung, we find the following.
- Press the volume button to take a photo, zoom or change the volume of the system (also present in mid-range Samsung Galaxy)
- Voice control (also present in mid-range Samsung Galaxy)
- Floating camera button (also present on mid-range Samsung Galaxy)
- Show the palm of your hand to take a selfie (also present in the mid-range Samsung Galaxy)
- Press heart rate sensor to take a selfie
Change the format of your photos

By default, the camera of Samsung devices shoots in 3: 4 format, the most common in mobile photography. However, if we want to capture more content (making sure that when we go to upload the photo this extra content is not going to be cut), we can change the format to taste.
- 3: 4
- 9:16
- 1: 1
- Full (all the format of your screen)
Clean the chamber
Although it seems obvious, having a clean camera on our phone will prevent photos from going wrong. It is more than usual to find blurry photographs, strange reflections from streetlights and other problems that users do not usually attribute a specific cause.
A dirty lens leads to less sharp photos and possible aberrations. Keeping the lens always clean ensures a better result
In most of these cases, it is because we have a dirty lens (something simple, especially in the Galaxy S8 and S9, due to the location of the fingerprint reader). Carrying a microfiber cloth on you is the best solutionAlthough if we do not want to complicate things, the shirt is our best ally to eliminate camera tracks.